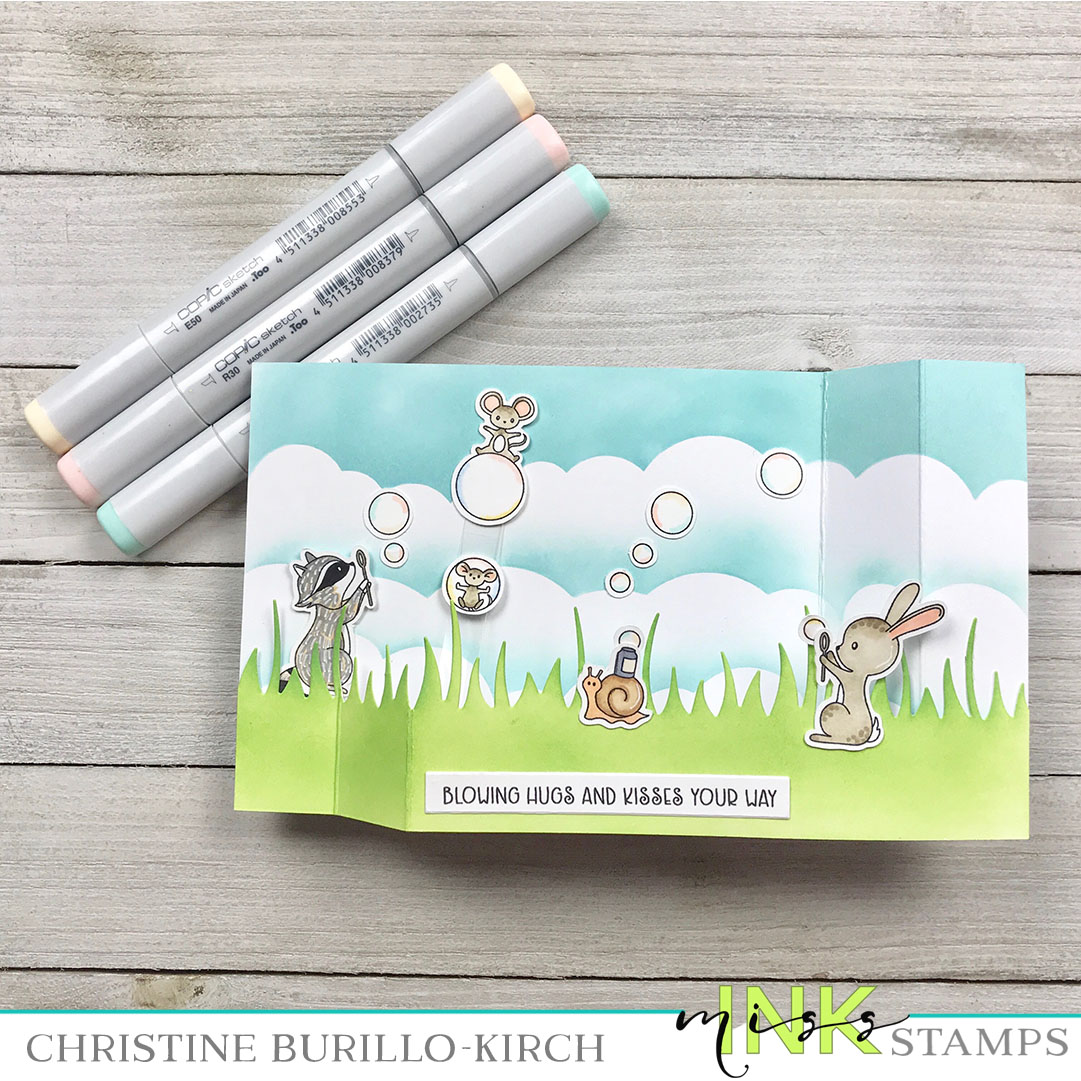
I have long wanted to make a wiper card, especially after seeing all the amazing inspiration from fellow team member Ali Farmer, her lovely video is here. I love all interactive cards and I feel the more kinds I make, the better I'll become and hopefully I'll design some of my own types hopefully. I didn't own a "wiper" die when I made this, I simply looked at several videos and made my own.
- Cut one panel of cardstock to the dimensions of 7.5 (length) inches by 4.25 (height) inches. Along the 7.5 length, score at 5.5 inches and again at 6.5 inches. Make a mountain fold with the folds on this panel. I blended a custom color of distress oxide ink that I had made (a few drops of mowed lawn added to a lot of broken china) with a cloud stencil from My Favorite Things and the Blendability brushes from Trinity Stamps.
- I cut a second panel of cardstock to the dimensions of 7.5 (length) inches by 3 inches (height). I blended the entire panel with Distress Oxide ink "Mowed Lawn" with the use of the Trinity Blendability brushes. I then die cut the entire panel multiple times with a grass die that I had (I used Lawn Fawn, but please use any company's) and then scored the panel along the length at 1 inch and then 2 inches.
- I prepared the wiper mechanism by cutting a 1 inch by 1/2 inch rectangle and then scored and folded the rectangle as shown below

- I cut a 3 inch by 1/2 inch piece of acetate which I stapled to a one side with the corner folded down. The other scored side was adhered to the back of the grass. I checked that the wiper mechanism worked before continuing on with the card.
- Finally I stamped images and a sentiment from the Bubblesstamp set and copic colored them before adhering them to the card.
Thank you so much for stopping by, I hope you will try to make a wiper card!
